Carpentry
first up
The Folding Carpenter's Trestle.
Yes, trestle. Not saw horse, that's something else. Before any carpentry project, if you don't have a pair of these, then it's the first thing to sort out. If you were apprenticed to a carpenter then you will know how to make a pair of these quickly. Slightly different design. These trestles or lunch seats, as we used to sit on them to take our lunch, can be made by anyone with a minimum of knowledge and only a few tools.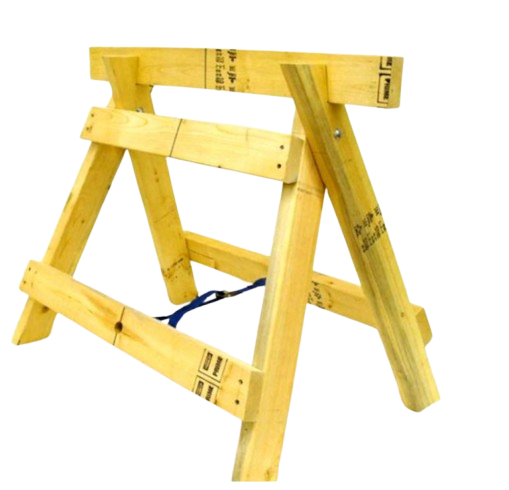
The timber should ideally be treated with a preservative, preferably tanalith. Size should be 50 x 100mm. Do not scrimp on these sizes as they will not last very long. I always use PSE ( planed sides and edges ) for a neater finish but you can use RS ( rough sawn ) as it is much cheaper.
If you have a work bench already then the finished height of the trestle should match. Ideally 900mm.
MATERIALS:
Multiply by 2 for a pair of trestles
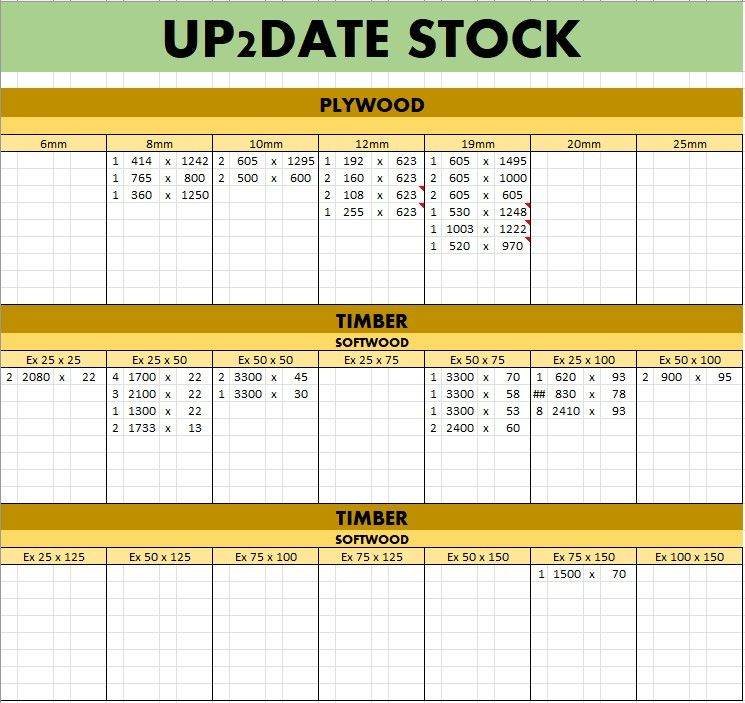
4 pieces softwood 50 x 100mm @ 900mm long, to cut to 865mm.
1 piece softwood 50 x 100mm @900mm long
2 pieces softwood 50 x 100mm @ 600mm long
1 piece softwood 50 x 100mm @ 700mm long
You will need 2 x 8mm x 150mm BZP ( bright zinc plated ) coach bolts, 6 x 8mm BZP washers, 4 x 8mm BZP nuts.
Short piece of 6mm rope, 12 size 8 x 100mm BZP screws, exterior wood glue.
TOOLS: 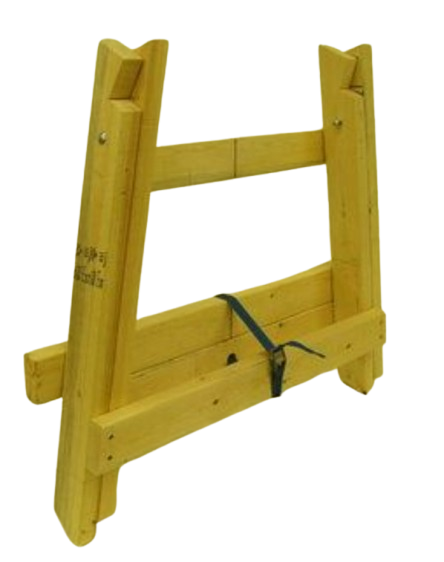
Handsaw, Skilsaw or chopsaw, power or battery drill / driver with 4, 6 and 8mm HSS drill bits, hammer, angle or protractor, tape measure and a 50mm chisel & mallet.
METHOD:
Start by checking the quality of the timber before you purchase. You do not have to accept timber that is not straight and full of shakes. For the trestle to fold neatly the timber needs to be true and straight.
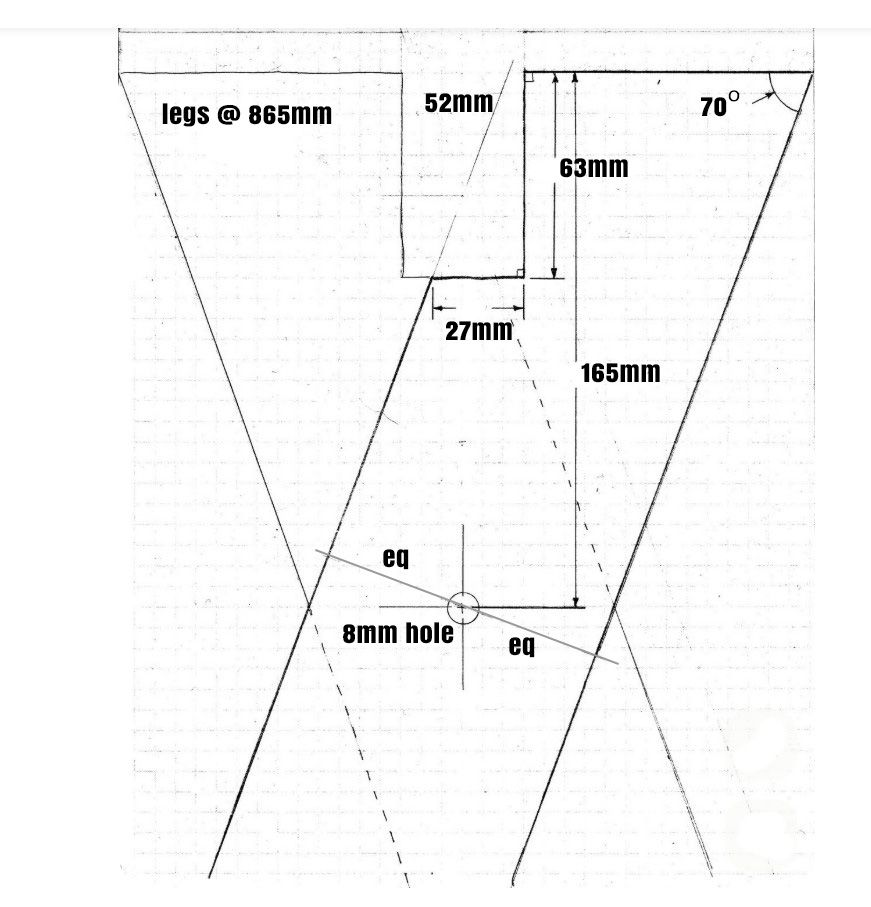
Cut the struts to the correct length 865mm and angle 70 degrees. All four must match. The extra length will help when cutting the 70 degree angle. The bottom of the strut should be parallel to the top so the trestle sits squarely on the ground.
It is important at this stage to accurately site the 8mm bolt hole and drill all four.
Next, cut the notch for the transom. Make it a bit tighter if you've used PSE timber. This can always be sorted out with the chisel when the trestle is assembled.
Push one of the 8mm coach bolts from the outside of one strut. Place two of the 8mm washers on the bolt and then place another strut reversed on the bolt. Place one 8mm washer on the bolt then thread the two nuts on. Tighten by hand only at this stage and tighten the locking nut down to secure the struts together. Repeat the process for the other two struts BUT this time fix them together handed to the other pair.
 The cross bracing can then be fixed using two screws and glue to each end. The 2 short 600mm cross braces should be screwed and glued to the inner struts. The bottom of the lower brace should be 150mm from the bottom of the strut. The top of the upper strut should be 250mm from the top of the struts. Turn the assembly over and glue and screw the 700mm long cross brace to the outer struts but in exactly the same place as the other lower brace. Leave the glued assembly overnight to dry.
Next morning, open the assembly apart and place the transom in the notches. If the transom doesn't fit with the struts placed properly on the floor, the sides of the notches can be trimmed to suit using the mallet and chisel..
Drill a 6mm hole through the centre of the lower braces and thread the rope with a knot on one end. With the transom sitting neatly in place, pull the rope tightly and tie off with another knot. Cut off the waste.
With the transom removed the trestle will fold neatly and can be hung on the wall. Then it's time to make the second one of the pair.
Next
The Carpenter's Workbench
I had already built a great workbench five years ago when we moved into our present house, but after rearranging our life a bit we decided to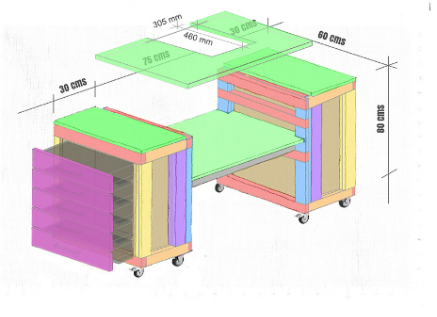 build a new storage shed. Alas the workbench didn't fit very well, so I decided to build a new bench, with the idea being it could come apart and be stored easily. I decided to purchase new timber and keep the old bench as it would be easier to use the chop-saw and the bench saw. The drawers come in handy as well to keep the small tools in.
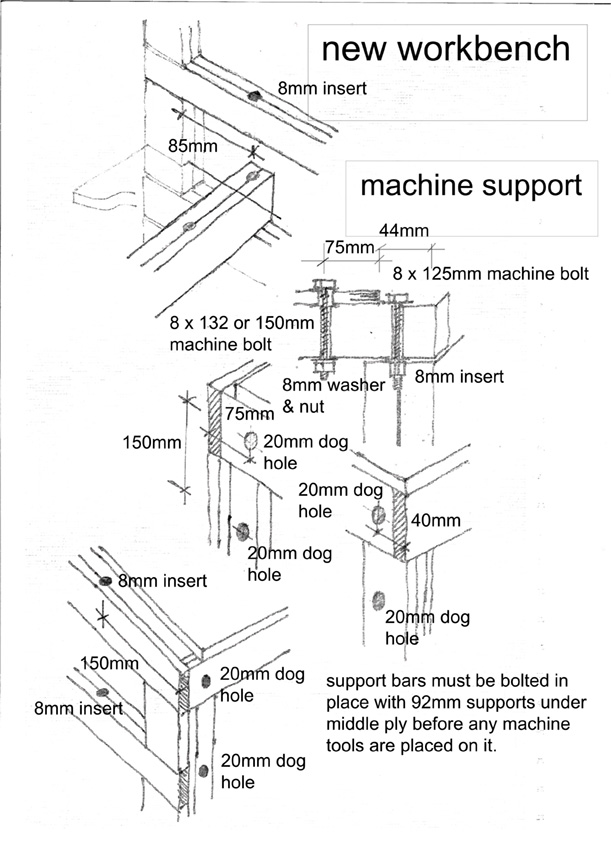
In the first year of moving into our new stone house, there was a tremendous storm and the wind threatened to flatten everything to the front of the house. I decided I would build three structures to divert and dissipate any storm in the future. After putting the first three steel poles in the wind never threatened again so I thought I would leave it at one barrier. This meant that I had at least 40 long lengths of timber left over. I decided to utilise this timber as much as possible into my design that previously called for an all plywood structure. Unlike plywood which is very stable, softwood can twist and distort. As I had plenty of timber I decided to use two pieces strongly glued together as all the uprights and cross braces. I then brought the whole thing together by gluing and pinning 12mm ply to the inside faces. This meant that the resulting bench would be very heavy so strong casters were required. I redesigned the bench paying careful attention to all the corner joints and lengths of the cross braces.
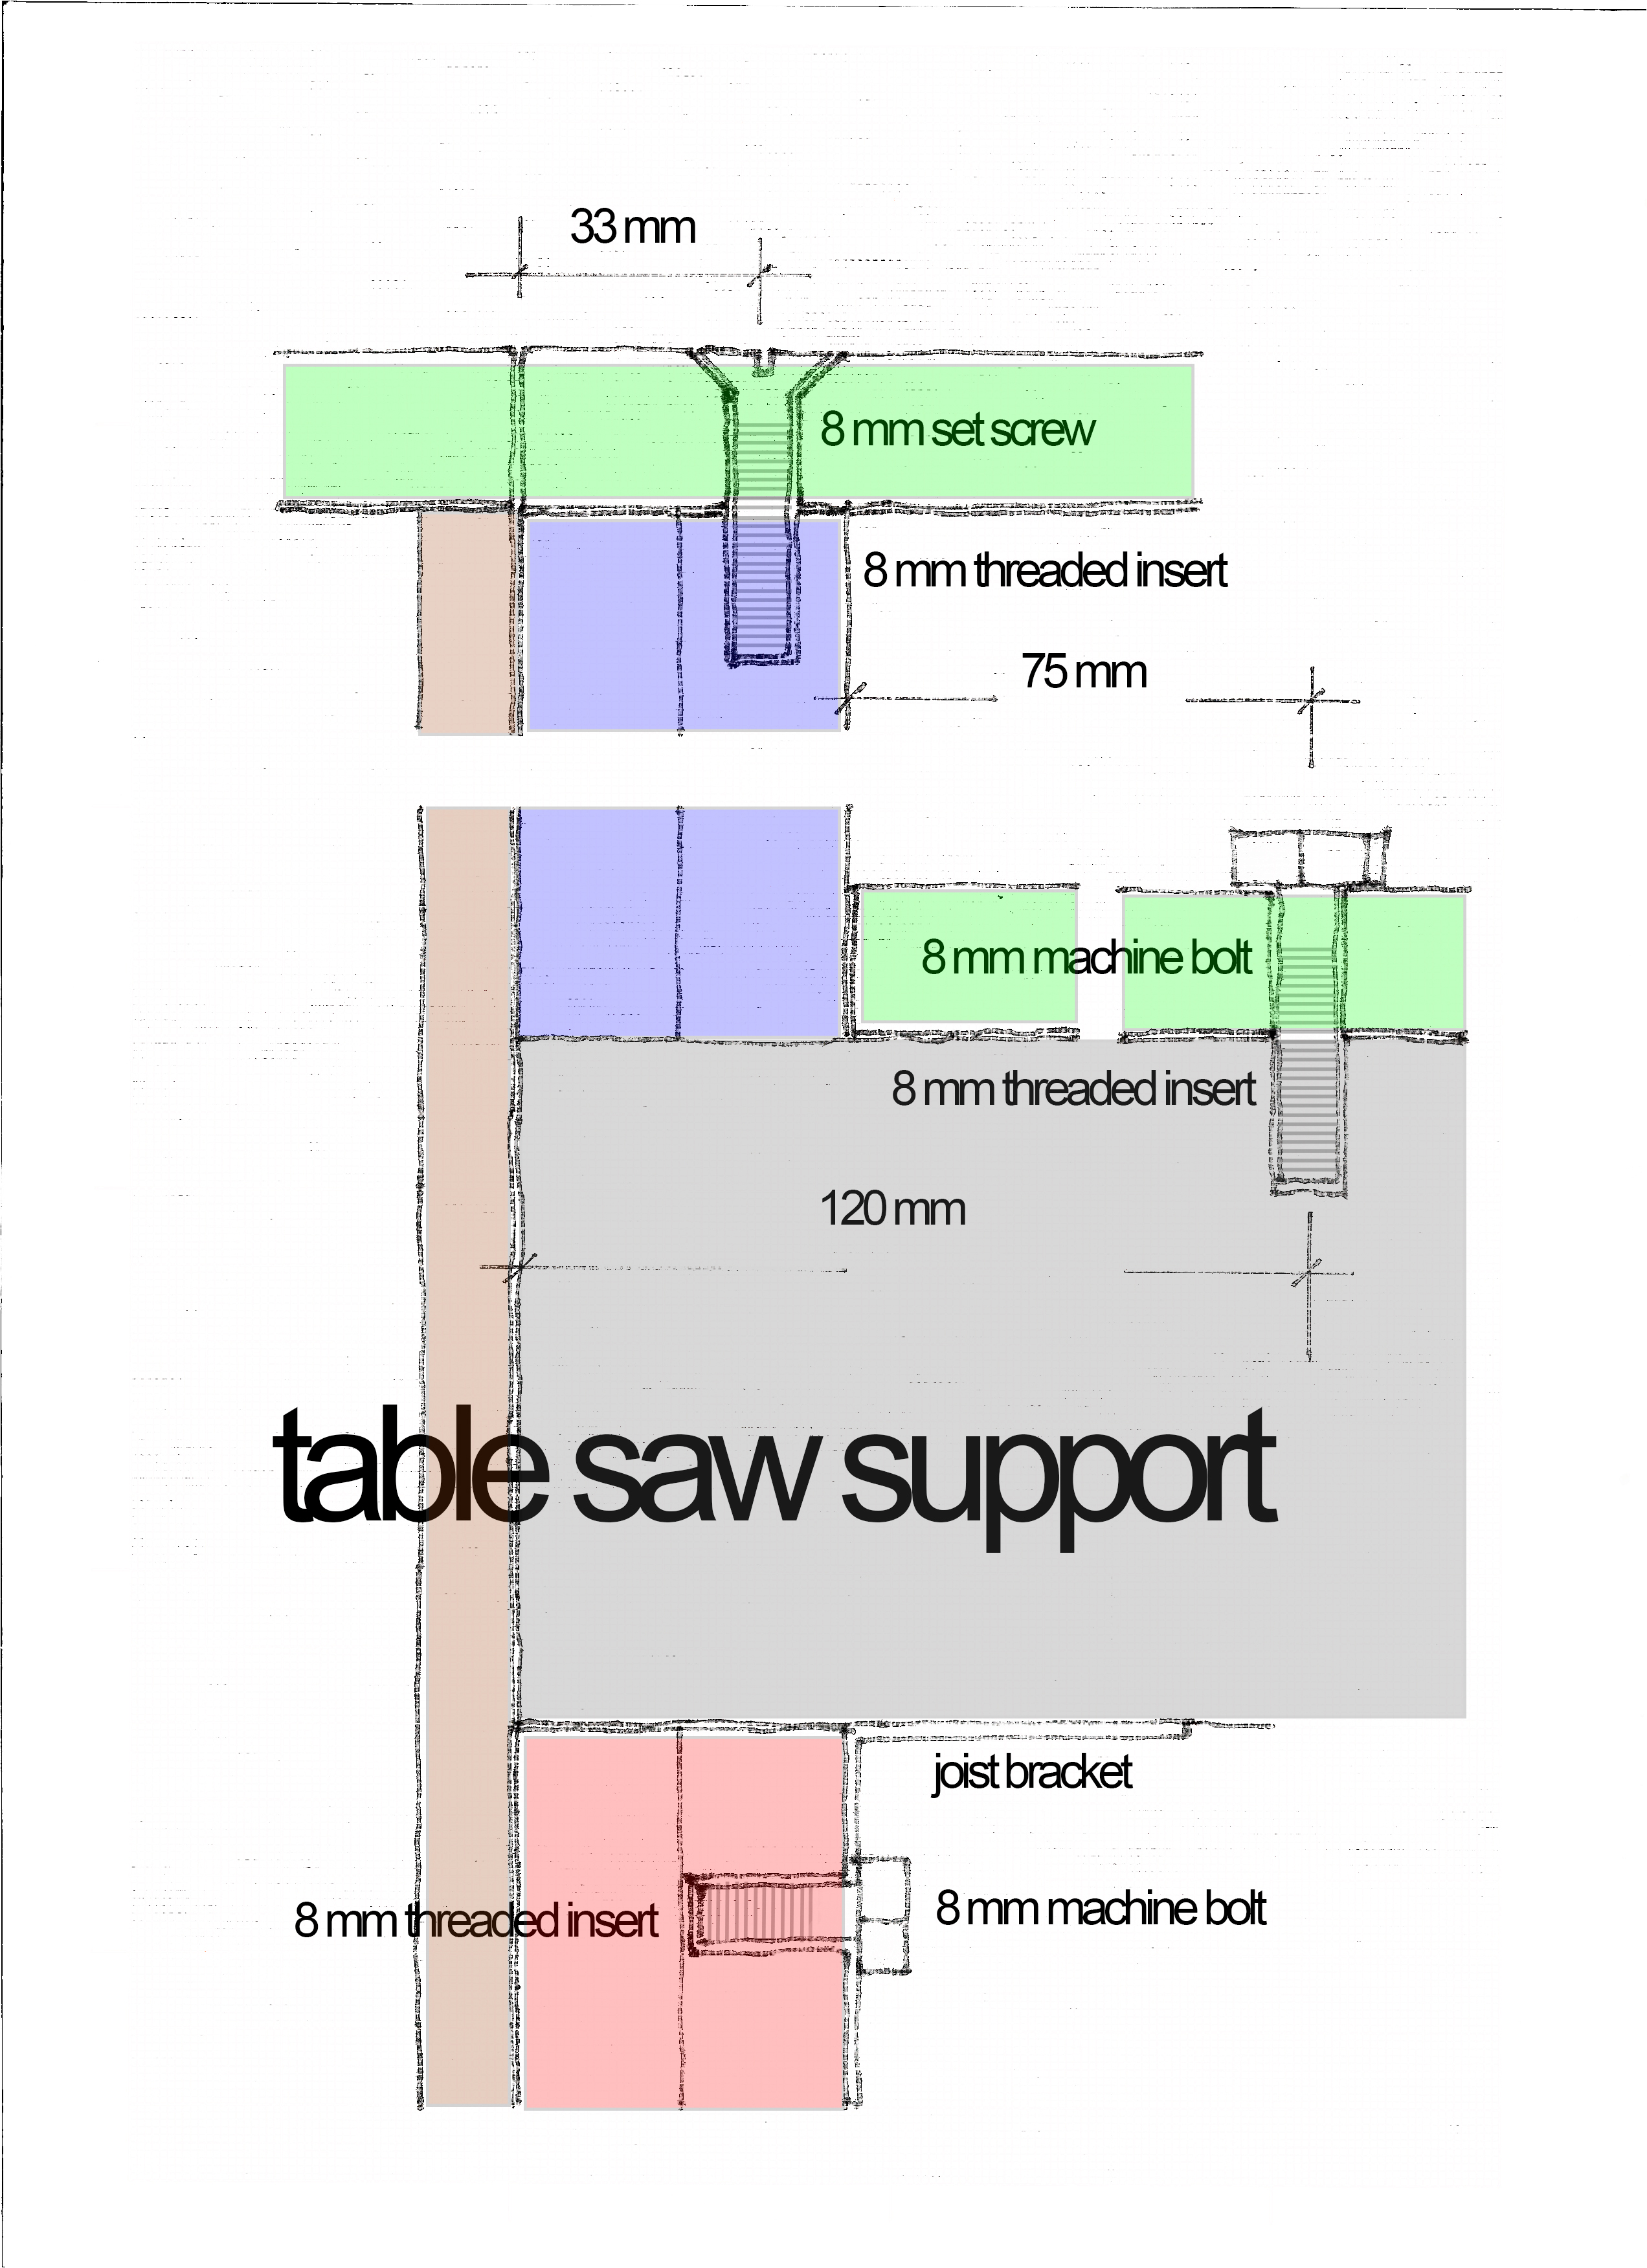
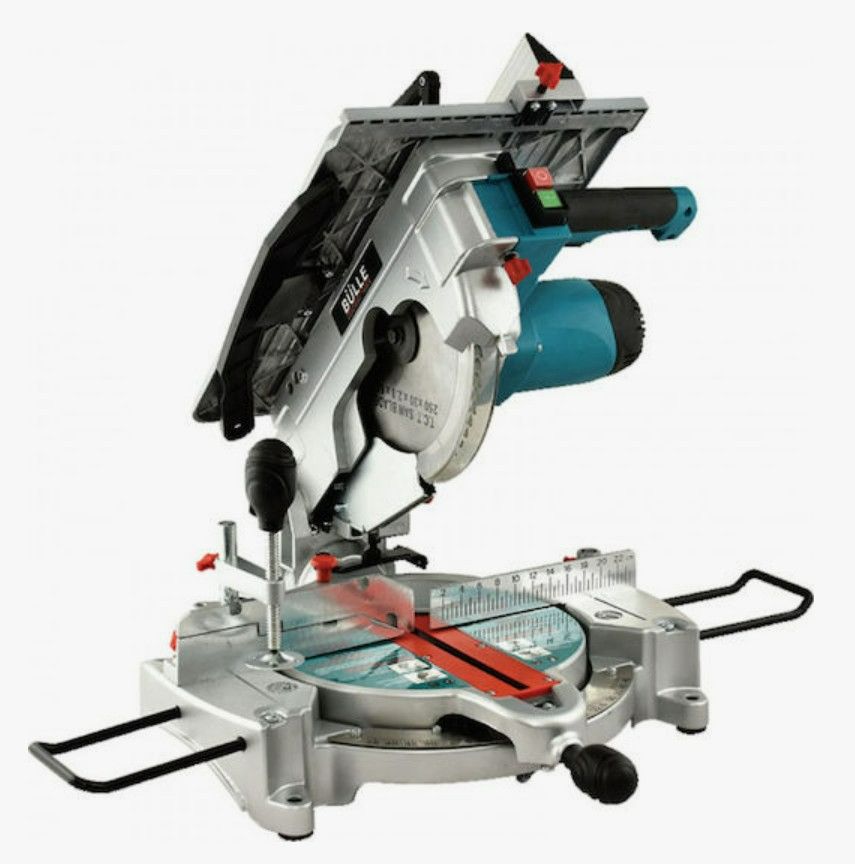 I wanted the bench to be able to house a combination bench saw that could convert from bench saw to mitre saw or chop-saw quickly and easily. I've shown the removeable top to be cut out but thinking about it I will probably let the saw cut ( kerf ) come through the plywood top as long as the saw blade cutting depth is OK. The saw blade will be at right angles to the drawers slides. The base plywood will have two levels of support as the chop-saw and bench saw are at different heights.
Before assembling the drawer units I glued and pinned 12mm plywood to the sides to act as drawer slides as I felt buying twenty drawer slides would be unfair to the hobby budget. I wouldn't do it again though as it has thrown up a big problem. I had used a piece of plywood as a slide to ensure the slide gaps were correct. I fitted them to slide easily. Unfortunately this was done during the summer months when temperatures were reaching 40 degrees. Now, in the autumn the drawers won't fit in the slides. Lots of sanding now on ten drawers. We live in the Apokoronas where moisture levels can be very high. These are my design sketches: